0x00 Preface
The previous article analyzed the PNG file format and introduced how to insert payloads into PNG files in the auxiliary data chunk tEXt format without affecting normal browsing. This time, we will introduce a technique for hiding payloads under the image data chunk IDAT—LSB steganography
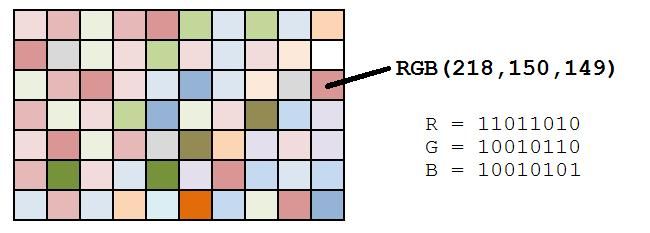
Image sourced from http://datagenetics.com/blog/march12012/index.html
0x01 Introduction
---
IDAT Data Chunk
- Stores image pixel data
- Can contain multiple consecutive image data chunks in the data stream
- Compressed using a derivative algorithm of LZ77
- Can be decompressed with zlib
Python implementation code for zlib decompression:
#! /usr/bin/env python |
Cited from http://drops.wooyun.org/tips/4862
LSB Steganography
- LSB stands for least significant bit
- In PNG files, image pixels are typically composed of three primary colors: red, green, and blue (RGB). Each color occupies 8 bits, with a value range from 0x00 to 0xFF, meaning there are 256 possible values per color. This results in a total of 256^3 colors, which is 16,777,216 colors.
- The human eye can distinguish approximately 10 million different colors.
- This means the human eye cannot distinguish the remaining approximately 6,777,216 colors.
- LSB steganography involves modifying the least significant bit (LSB) of the RGB color components, and the human eye does not notice the change before and after.
- Each pixel can carry 3 bits of information.
0x02 Python Implementation
---
Notable projects on GitHub for learning about LSB steganography:
https://github.com/RobinDavid/LSB-Steganography
https://github.com/cyberinc/cloacked-pixel
Testing cloacked-pixel below
Test image:

Source file download URL:
http://www.easyicon.net/language.en/1119182-Enderman_Png_icon.html
1. Encryption
Run:
python lsb.py hide big.png 1.txt 123456 |
Parameter description:
hide: indicates encryption mode
big.png: PNG image to be encrypted
1.txt: stores the payload
123456: encryption password
After running, generate the image big.png-stego.png
As shown in the figure

Analyze the format of the encrypted image big.png-stego.png using the check.cpp introduced in the previous article
Download link:
An open-source project
Comparison before and after encryption as shown in the figure
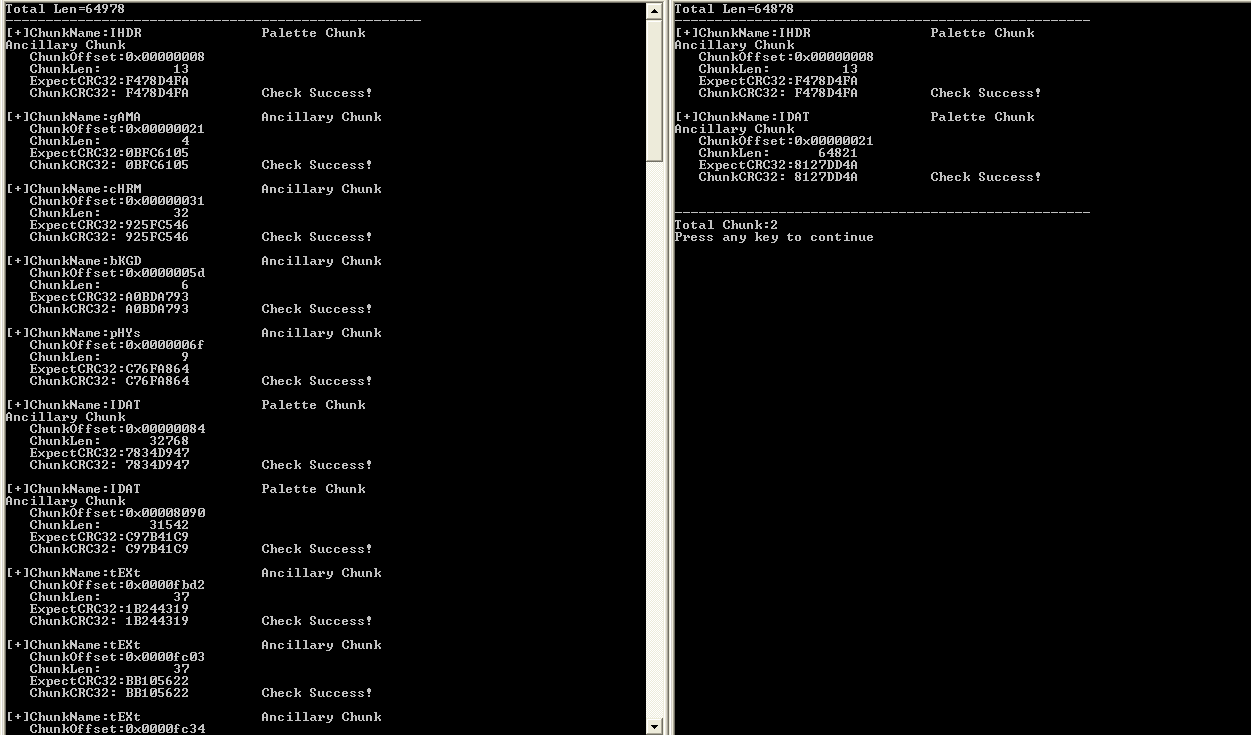
cloacked-pixel deletes other data chunks during encryption, retaining only the key IDAT data chunks
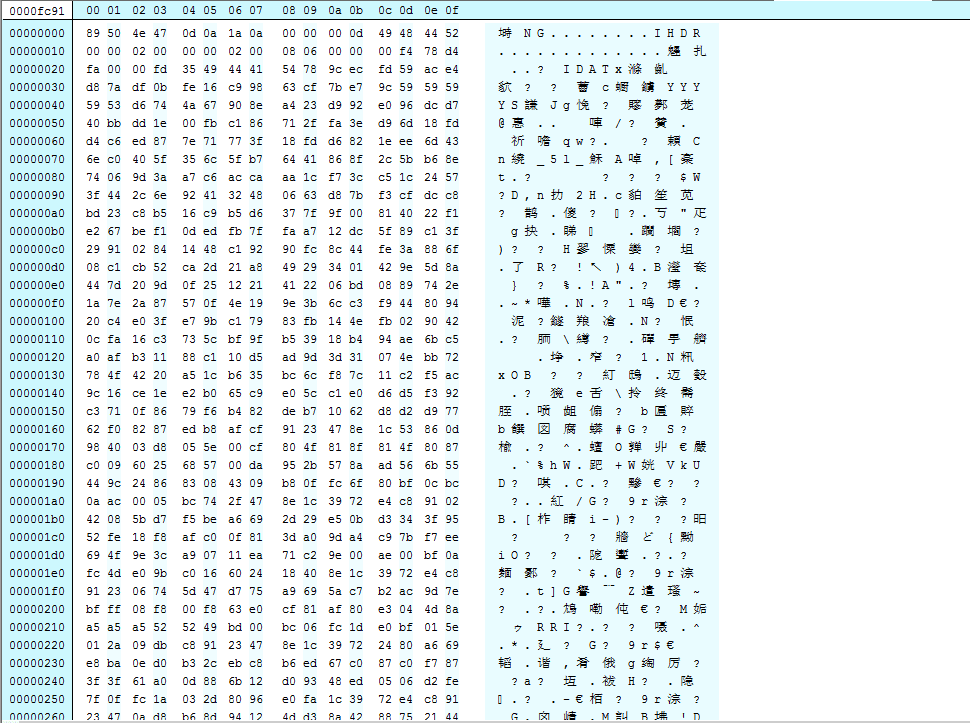
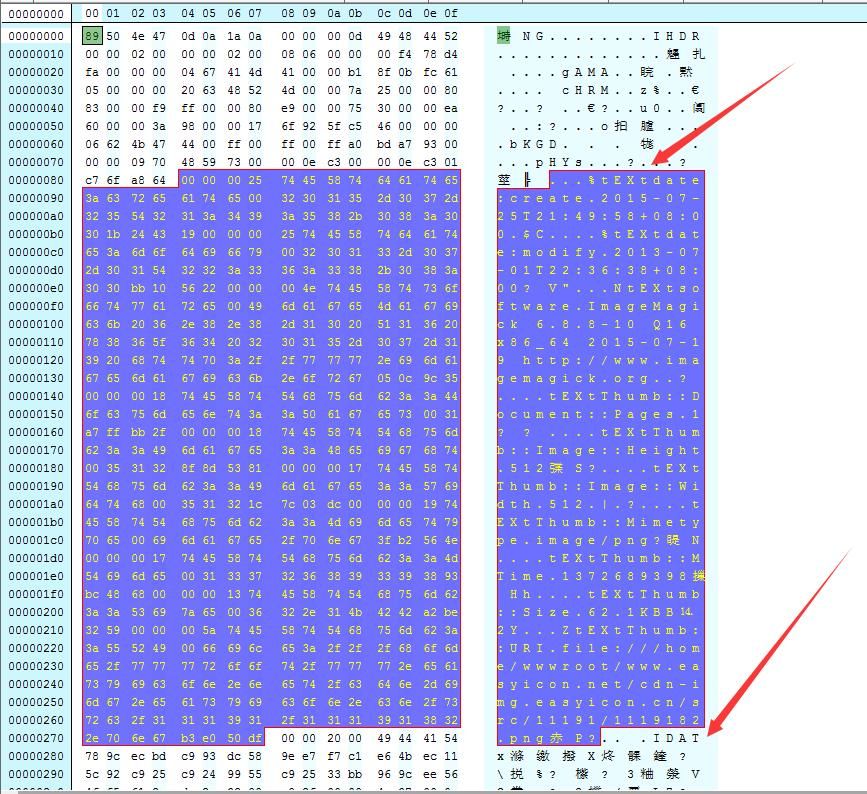
Using HexEditorNeo to view the encrypted image also confirms our judgment, as shown in the figure
Note:
Of course, analysis can also be performed by reading the source code
2. Decryption
Run:
python lsb.py extract big.png-stego.png 3.txt 123456 |
Parameter description:
extract: indicates decryption mode
big.png-stego.png: PNG image to be decrypted
3.txt: stores the exported payload
123456: decryption password
As shown, successfully decrypted to obtain payload

3. Analysis
Run:
python lsb.py analyse big.png-stego.png |
Parameter description:
analyse: indicates analysis mode
big.png-stego.png: PNG image to be analyzed
After running, the image will be analyzed, divided into blocks, and the least significant bits of each block will be marked
As shown in the figure
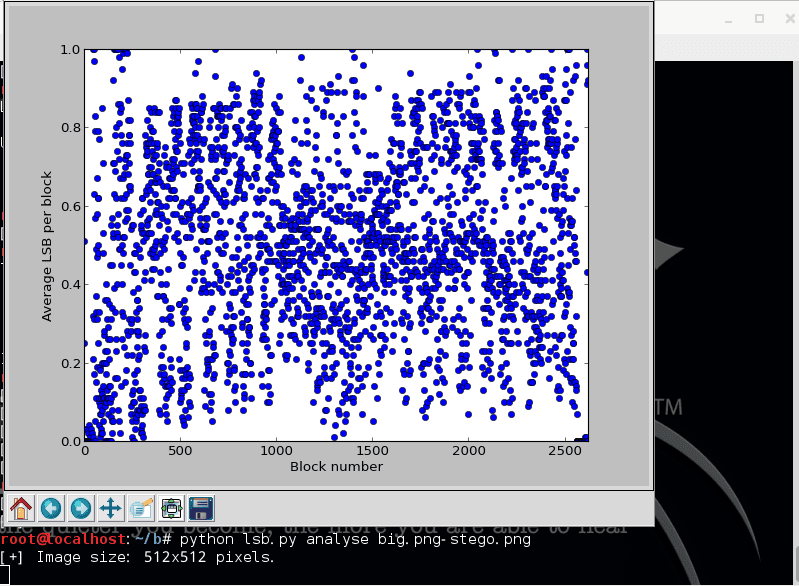
This is a comparative analysis diagram before and after encryption
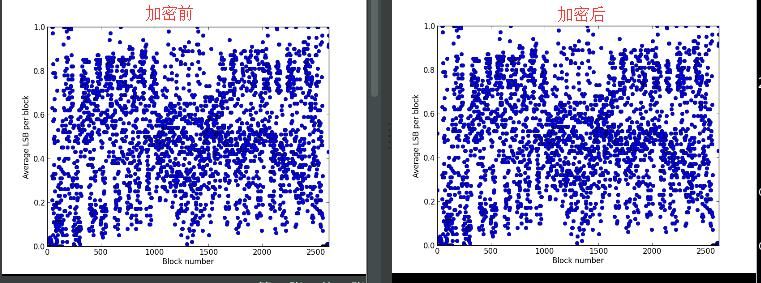
The difference in the images is almost indistinguishable to the naked eye, because the shorter the payload, the smaller the difference in the analysis diagram. Here we can use software to assist in the analysis
Tool name:Stegsolve
Download address:
http://www.caesum.com/handbook/Stegsolve.jar
Environment setup:
Install JDK and configure the Java environment
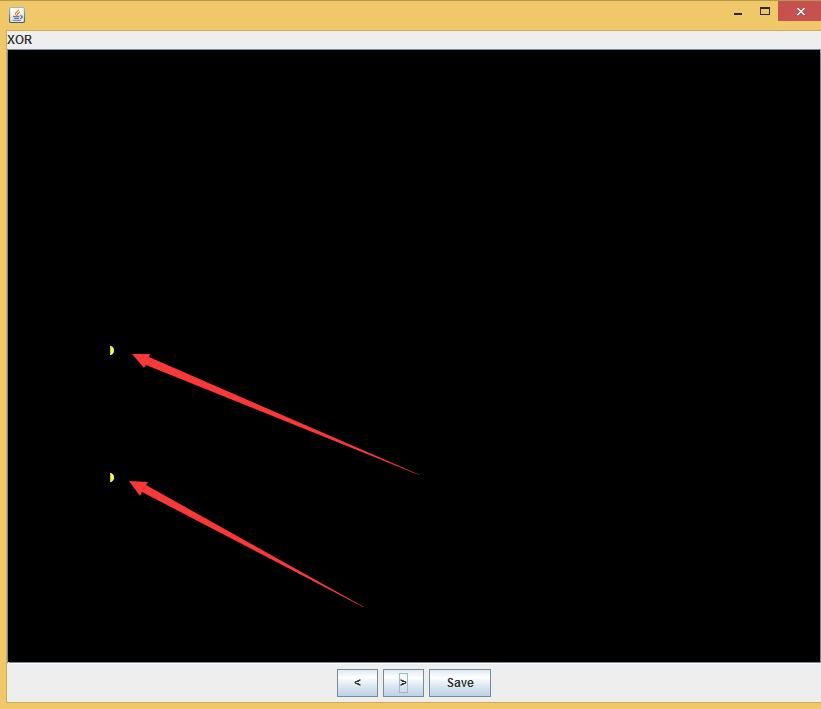
Open a.png with Stegsolve, select Analyse-Image Combiner, and choose b.png
Perform XOR comparison, as shown in the figure, subtle differences are detected
0x03 C++ Implementation
---
Grant Curell shared a method implemented through C++, which is worth learning, so here we introduce and test it.
Article address:
http://www.codeproject.com/Articles/581298/PNG-Image-Steganography-with-libpng
Author:
Grant Curell
Code download link:
http://www.codeproject.com/KB/security/581298/PNG_stego.zip
Test environment:
Win7 X64
vs2012
1. Direct compilation will report an error
The zlib project can be compiled successfully directly
Compiling the libpng project, the error is as follows:
fatal error C1083: Cannot open include file: 'zlib.h': No such file or directory |
Solution:
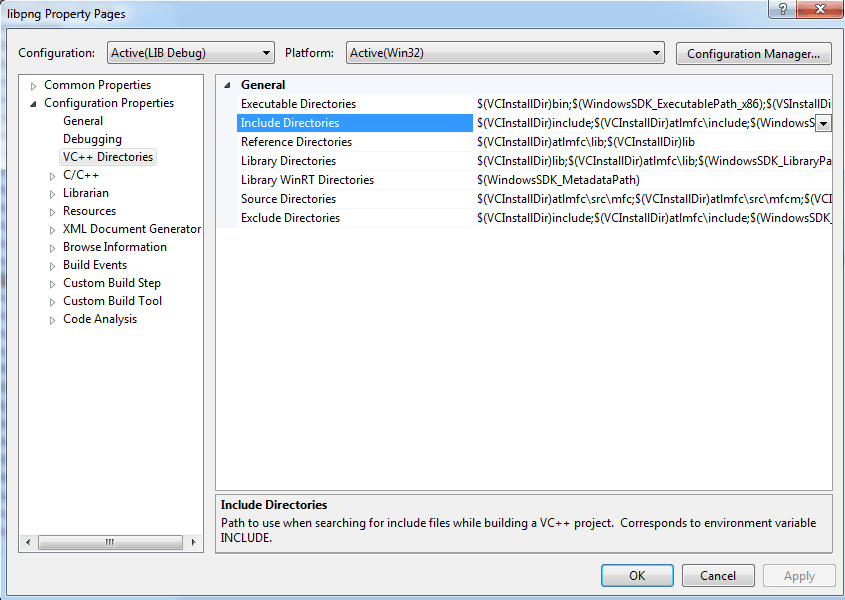
Need to add include directory to the project
Right-click - Property - VC++ Directories
Select Include Directories
As shown in the figure
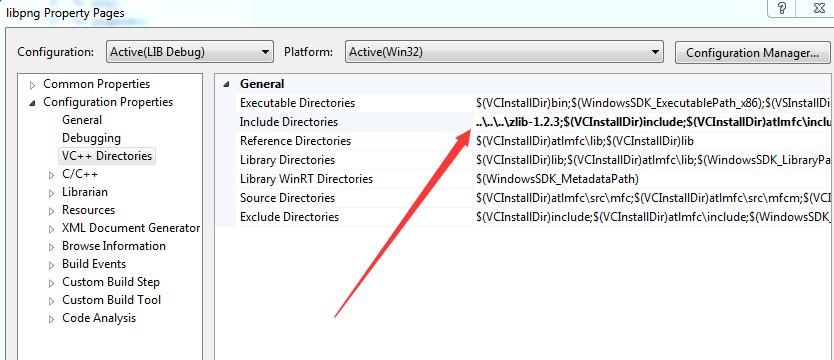
Add zlib-1.2.3, input:
..\..\..\zlib-1.2.3; |
As shown in the figure
Compile again, error reported as follows:
fatal error LNK1181: cannot open input file 'zlib.lib' |
Solution:
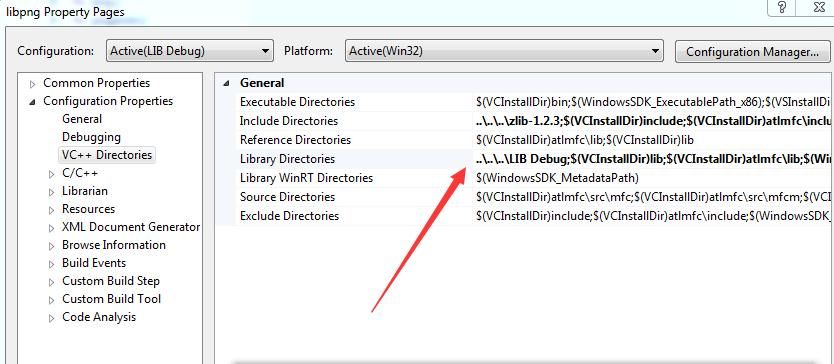
Need to add lib directory to the project
Select Library Directories
Add zlib.lib, input:
..\..\..\LIB Debug; |
As shown, compilation succeeded
Tips:
In Include Directories and Library Directories, absolute paths can also be directly specified (e.g., C:\test\cloacked-pixel-master\PNG_stego\zlib-1.2.3). This example uses ..\ to represent relative paths
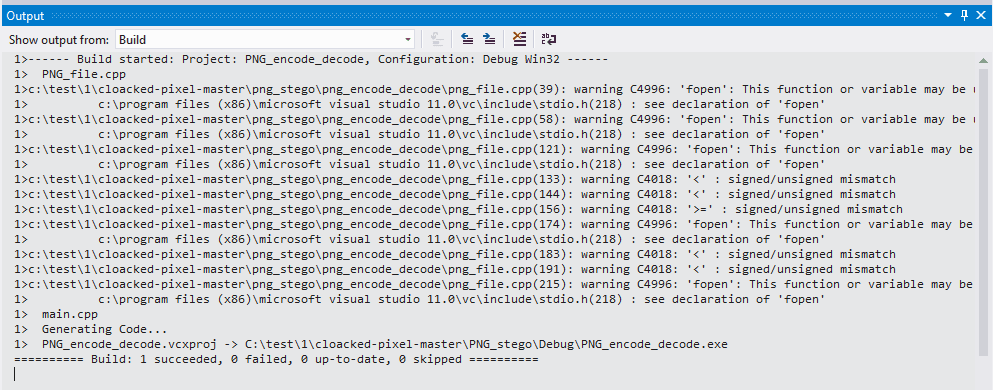
When compiling the project PNG_encode_decode, the same compilation error occurs
Solution:
Add zlib-1.2.3 and libpng-1.2.37-src under Include Directories, input:
../zlib-1.2.3;../libpng-1.2.37-src; |
Add libpng.lib under Library Directories, input:
..\LIB Debug; |
As shown, final compilation succeeded
Note:
Three project components have sequential dependencies, so the compilation order is zlib-libpng-PNG_encode_decode
2. Encryption Testing
File to be encrypted: big.png
Payload file: 1.txt
Output encrypted file: bigen.png
Modify main.cpp in project PNG_encode_decode as follows:
#include "PNG_file.h" |
After execution, bigen.png is generated as shown

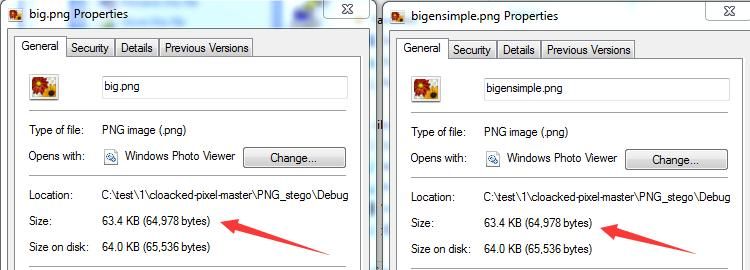
Comparing files before and after encryption shows size differences as illustrated
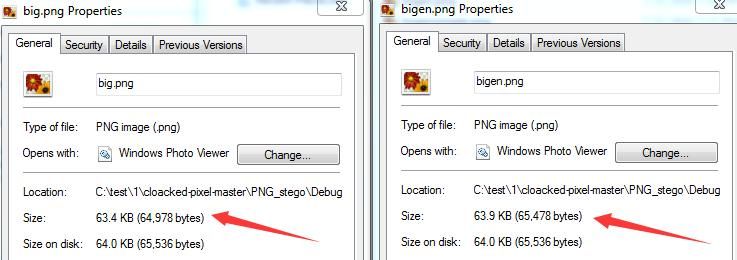
In principle, LSB steganography does not change file size; investigate the cause
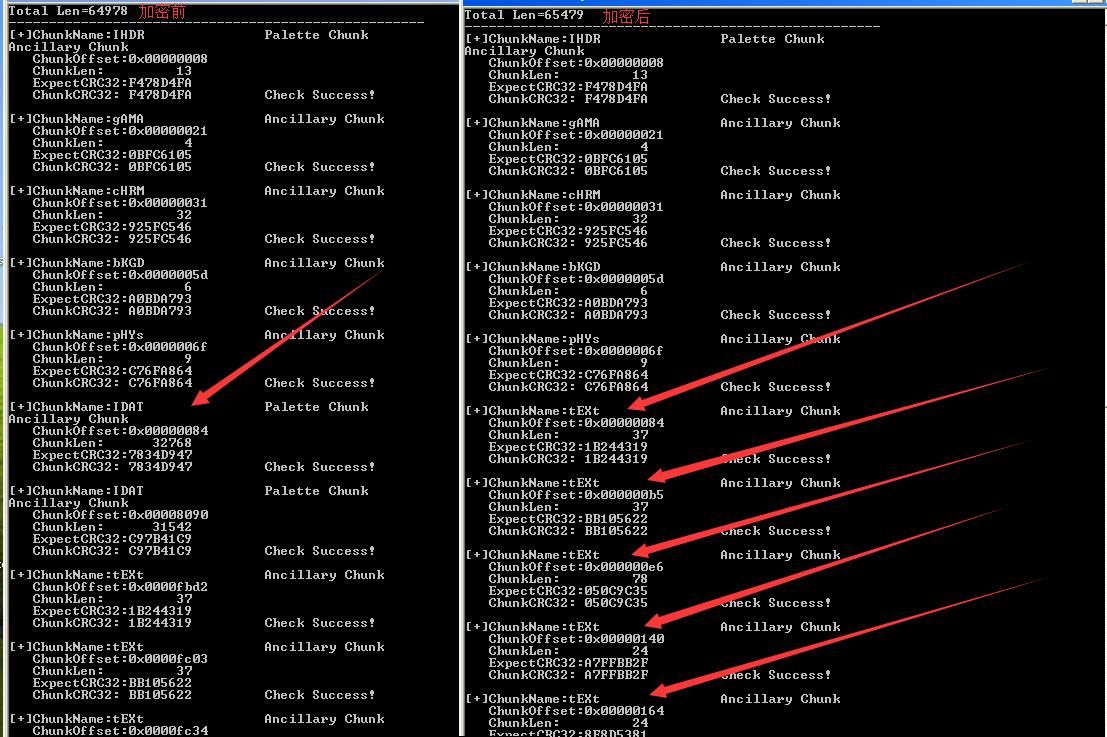
Using check.cpp to parse the data chunk directory, several additional tTXt segments were found after encryption
As shown in the figure
Using HexEditorNeo to view the details of the encrypted image, as shown in the figure
The encrypted image contains some information from the original image, resulting in different image sizes
3. Remove redundant information
Method a:
Use HexEditorNeo to directly delete redundant information
Method b:
Use compress.cpp
Download link:
An open-source project
Generate encrypted image bigensimple.png with redundant tTXt chunks removed, as shown

bigensimple.png has the same size as the original image, as shown
4. Decryption Test
Modify main.cpp in project PNG_encode_decode as follows:
#include "PNG_file.h" |
After running, 2.txt is generated, obtaining the stored encrypted payload
(5) Analysis
For LSB steganography, Stegsolve can be used for auxiliary analysis
After opening the encrypted image, select Analyse-DataExtract
Select the 0th bit of Reg, Green, and Blue in Bit Planes
Select LSB First in Bit Order
Select RGB in Bit Plane Order
The encrypted form of the payload can be seen, as shown in the figure

Note:
Of course, the encrypted data of the image can be found by reading the program source code. This example only provides some reference ideas for image analysis.
0x04 Summary
---
This article introduces how to implement LSB steganography for PNG files using Python and C++ respectively. By following the analysis ideas in the article, common LSB steganography data can also be extracted and analyzed.
Note:
The modified PNG_stego project has been uploaded to GitHub:
An open-source project
More learning materials:
https://github.com/fgrimme/Matroschka
https://waronpants.net/article/png-steganography/
https://waronpants.net/pngsteg/trunk/steg.c
http://www1.chapman.edu/~nabav100/ImgStegano/
http://www.libpng.org/pub/png/libpng-1.2.5-manual.html#section-3.1
https://www.w3.org/TR/PNG/