0x00 Preface
---
The previous article introduced using Apache's mod_rewrite module to achieve HTTP traffic distribution. This article will build on that to introduce HTTPS traffic distribution, verifying the client's certificate. Traffic will only be forwarded to the real server if the certificate is valid.
0x01 Introduction
---
This article will cover the following:
- Configuring Apache to enable SSL on Windows systems
- Configuring Apache to enable SSL on Ubuntu systems
- Methods and challenges of generating certificates using OpenSSL
- Configuring Apache for HTTPS mutual authentication
- The process of implementing HTTPS traffic distribution
0x02 Configuring Apache to Enable SSL on Windows Systems
---
1. Download Apache with OpenSSL included
Address:
http://httpd.apache.org/download.cgi
Select the required version, test version Apache 2.4.33, download address:
https://www.apachehaus.com/cgi-bin/download.plx?dli=wUWZ1allWW00kej9iUG5UeJVlUGRVYRdnWzQmW
2、Installation
After extraction, install via command line:
cd \Apace24\bin |
3、Configure httpd.conf
Located at \Apace24\conf\httpd.conf
(1)
Locate:
#LoadModule ssl_module modules/mod_ssl.so |
Remove the #
(2)
Location:
|
Change Include conf/extra/httpd-ahssl.conf to Include conf/extra/httpd-ssl.conf
Note:
httpd-ahssl.conf is Apache's built-in SSL configuration, which by default generates usable private keys and certificates (located in \Apache24\conf\ssl). You can also directly modify httpd-ahssl.conf for configuration.
4. Configure httpd-ssl.conf
Located in \Apache24\conf\extra\httpd-ssl.conf
(1)
Location:
|
Change to:
|
(2)
Locate:
SSLCertificateFile "${SRVROOT}/conf/server.crt" |
Change to the path of your own certificate file (generation method will be introduced later)
(3)
Locate:
SSLCertificateKeyFile "${SRVROOT}/conf/server.key" |
Change to the path of your own private key file (generation method will be introduced later)
5. Restart Apache
httpd.exe -k restart |
0x03 Configuring Apache to enable SSL on Ubuntu
---
1. Install Apache
sudo apt-get install apache2 |
2. Install OpenSSL
sudo apt-get install openssl |
3. Enable the Apache SSL module
a2enmod ssl |
4. Edit the file /etc/apache2/sites-enabled/default-ssl.conf
Specify the paths for the private key file and the signed certificate
SSLEngine on |
5. Enable Apache's default SSL virtual host
a2ensite default-ssl |
6. Restart Apache:
sudo /etc/init.d/apache2 restart |
0x04 SSL Certificate Generation Process
---
1. Client generates a public-private key pair (.key file)
2. Client generates a certificate signing request (.csr file)
Send the csr file to a CA for verification. If approved, the CA signs the csr file with its private key to generate a certificate file (.crt file), which is sent to the user. The user uses this certificate to prove their identity
Generation method:
Input:
- User's private key
- User information
Output:
csr file, including user's public key and user information
3. CA reviews the request and generates the certificate file (.crt)
Typically, the CSR file is sent to a Certificate Authority (CA) for validation, but we can review it ourselves to generate a self-signed certificate (usable for testing, not guaranteed to be trusted)
0x05 Using OpenSSL to generate an SSL certificate
---
After installing OpenSSL on Ubuntu, you can run openssl directly
Windows installs OpenSSL by default after installing Apache, located at \Apache24\bin
1. Conventional method:
(1) Generate a 2048-bit encrypted private key
openssl genrsa -out server.key 2048 |
(2) Generate a certificate signing request
openssl req -new -key server.key -out server.csr |
Then fill in the configuration information sequentially; the Common Name field must correspond to the domain name (test domain is test.com)
(3) Generate a self-signed certificate
openssl x509 -req -days 3650 -in server.csr -signkey server.key -out server.crt |
2. Quick method:
Automatically generate OpenSSL configuration parameters through the website at the following address:
https://myssl.com/csr_create.html
After filling in the configuration information, OpenSSL parameters are automatically generated as shown below
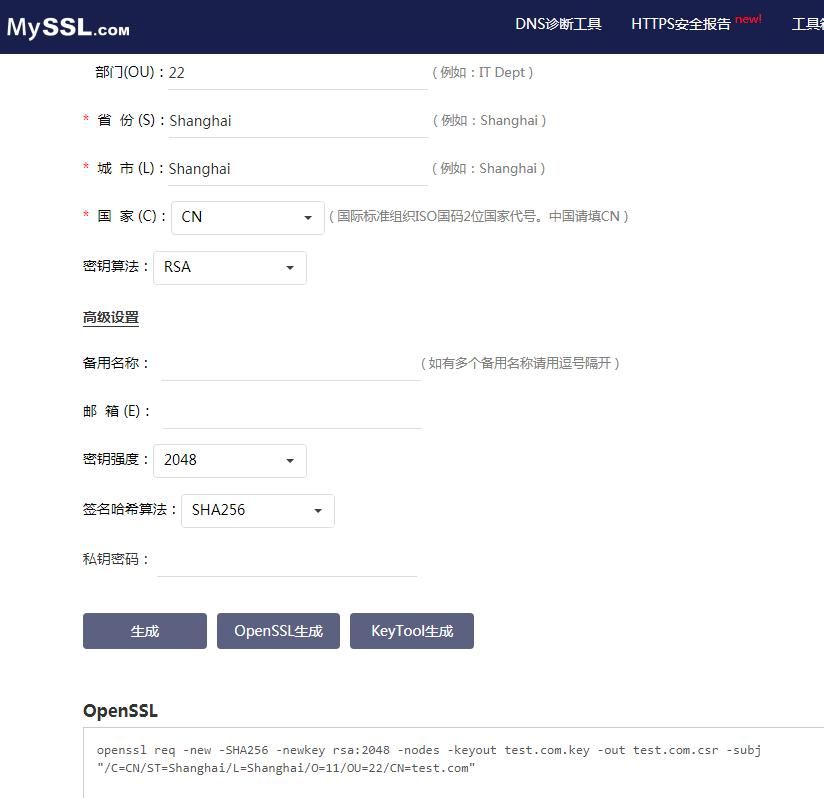
Parameters are as follows:
openssl req -new -SHA256 -newkey rsa:2048 -nodes -keyout test.com.key -out test.com.csr -subj "/C=CN/ST=Shanghai/L=Shanghai/O=11/OU=22/CN=test.com" |
Generate private key file test.com.key and certificate signing request test.com.csr
Then generate a self-signed certificate:
openssl x509 -req -days 3650 -in test.com.csr -signkey test.com.key -out test.com.crt |
Actual testing:
(1) Modify the SSL configuration of the Apache server
SSLCertificateFile points to the path of the self-signed certificate (.crt file)
SSLCertificateKeyFile points to the path of the private key file (.key file)
Restart the Apache service
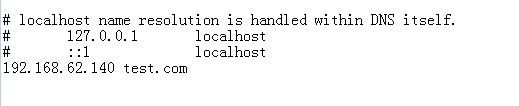
(2) Client modifies the hosts file:
Apache server IP corresponds to test.com
As shown in the figure below
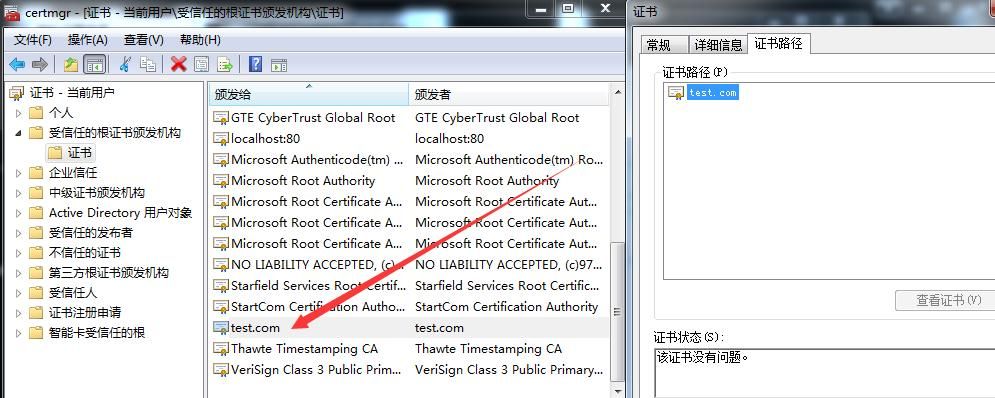
(3) The client installs the self-signed certificate into the trusted root certification authorities
After installation, as shown below
(4) The client accesses the Apache server
Access fails, prompting that its security certificate does not specify a subject alternative name, as shown below
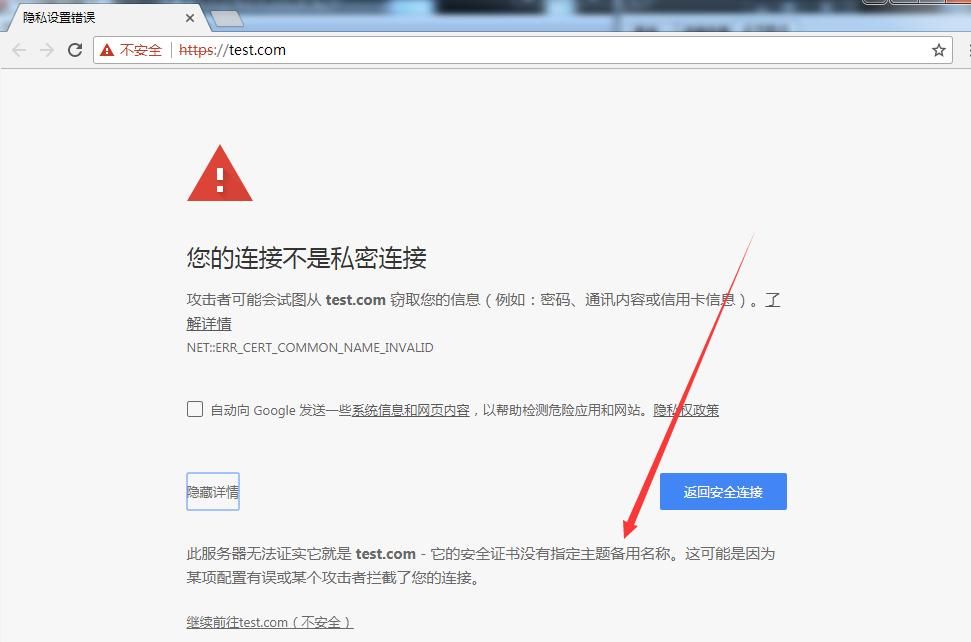
Both the conventional method and the shortcut method for generating certificates have this issue
3. Solution
The certificate lacks the Subject Alternative Name (SAN), which needs to be added via the configuration file
Reference materials:
https://support.citrix.com/article/CTX135602_
Create a new file req.cnf with the following content:
[req] |
Note:
Both CN and DNS.1 must be set to the domain name (test domain is test.com)
Generate private key and self-signed certificate:
openssl req -x509 -nodes -days 365 -newkey rsa:2048 -keyout test.com.key -out test.com.crt -config req.cnf -sha256 |
Modify Apache server SSL configuration, specify new private key file (test.com.key) and certificate file (test.com.crt), restart Apache service
Install self-signed certificate file test.com.crt on client
Access Apache server, certificate is valid, everything works normally, as shown below

Supplement:
In the future, openssl may support setting parameter DNS.1, relevant information:
https://github.com/openssl/openssl/pull/4986
0x06 Rule configuration to implement HTTPS traffic distribution
---
1. Enable Two-Way Authentication
The server verifies the client certificate. Only if the client certificate is valid can the client access the webpage normally; otherwise, access is denied.
(1) Windows System
1. Generate Client Certificate
openssl req -new -SHA256 -newkey rsa:2048 -nodes -keyout user.key -out user.csr -subj "/C=CN/ST=Shanghai/L=Shanghai/O=11/OU=22/CN=user" |
**2. Edit Server File \Apache24\conf\extra\httpd-ssl.conf
Add the path to the client certificate, pointing to user.crt
SSLEngine on |
Enable Client Authentication:
SSLVerifyClient require |
3. Restart Apache
httpd.exe -k restart |
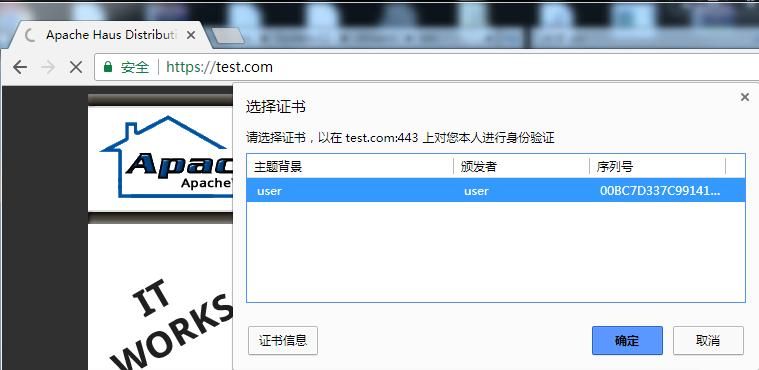
4. Install client certificate user.p12
A pop-up prompts when accessing the webpage; normal access resumes after confirming the certificate, as shown below
(2) Ubuntu System
1. Generate client certificate
openssl req -new -SHA256 -newkey rsa:2048 -nodes -keyout user.key -out user.csr -subj "/C=CN/ST=Shanghai/L=Shanghai/O=11/OU=22/CN=user" |
**2. Edit server file /etc/apache2/sites-enabled/default-ssl.conf
Specify the paths for private key file, signed certificate, and client certificate
SSLEngine on |
Enable client authentication:
SSLVerifyClient require |
3. Restart Apache
sudo /etc/init.d/apache2 restart |
4. Install client certificate user.p12
Normal access
2. Traffic forwarding
Configuration method refers to the previous article, not repeated here
Ultimately, it can judge HTTPS traffic, forwarding to the real server if the certificate is valid
If the certificate is invalid, choose to forward to the Cover Server or not provide service
0x07 Summary
---
This article introduces the method of configuring Apache HTTPS on Windows and Ubuntu systems, shares the SSL certificate generation method and configuration process, achieves traffic judgment for HTTPS from a technical research perspective, and distributes HTTPS traffic based on conditions.
At this point, the traffic distribution function for Hive has been successfully implemented.