0x00 Preface
---
Recently, Matthew Mesa and Axel F from Proofpoint discovered a novel phishing method where attackers use troubleshooting packs as email attachments to deceive users into executing them, thereby covertly running payloads. Their article details the methods and concealment techniques employed by attackers, urging users to remain vigilant.
Article link:
https://www.proofpoint.com/us/threat-insight/post/windows-troubleshooting-platform-leveraged-deliver-malware
This article will approach from a technical research perspective, explaining how to develop a troubleshooting pack containing a payload, and analyzing defense methods in conjunction with attack strategies, aiming to enhance everyone's understanding of this technology.
0x01 Introduction
---
Windows Troubleshooting Platform:
English translation: Windows Troubleshooting Platform, abbreviated as WTP
Developers can write troubleshooting packs based on this platform to help users resolve PC issues they encounter
WTP structure is shown in the figure
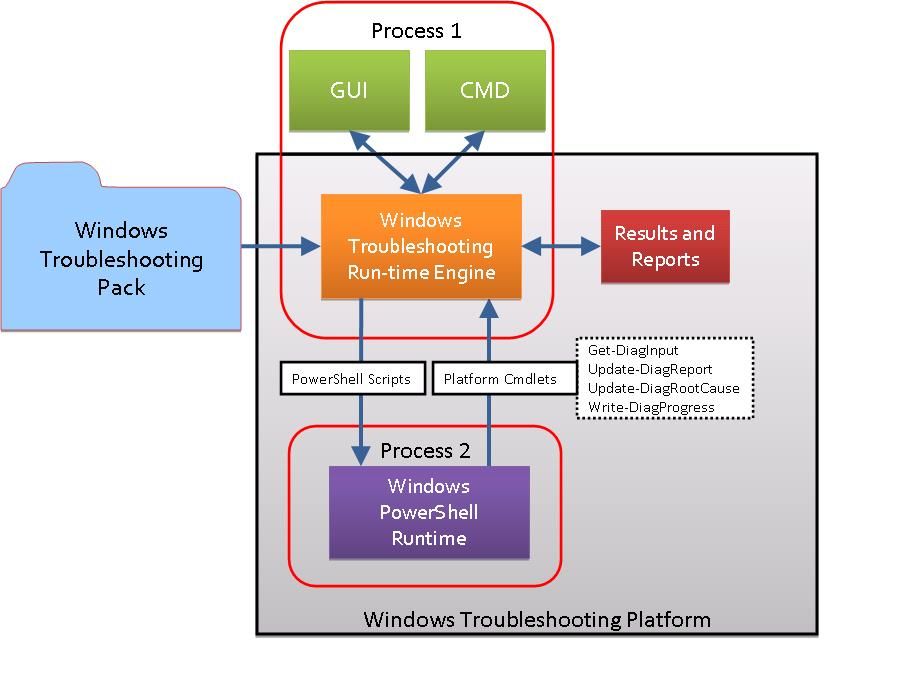
Image referenced from https://msdn.microsoft.com/en-us/library/windows/desktop/dd323706(v=vs.85).aspx
The brief process is as follows:
- Check the digital signature of the troubleshooting package; if unavailable, exit directly.
- Execute detection scripts, resolution scripts, and verification scripts sequentially to attempt to resolve the issue.
- Generate a result report and a debugging report.
Troubleshooting package:
Consists of five components:
- Troubleshooting manifest
- Detection scripts
- Resolution scripts
- Verification scripts
- Localized resources
Details are shown in the figure.
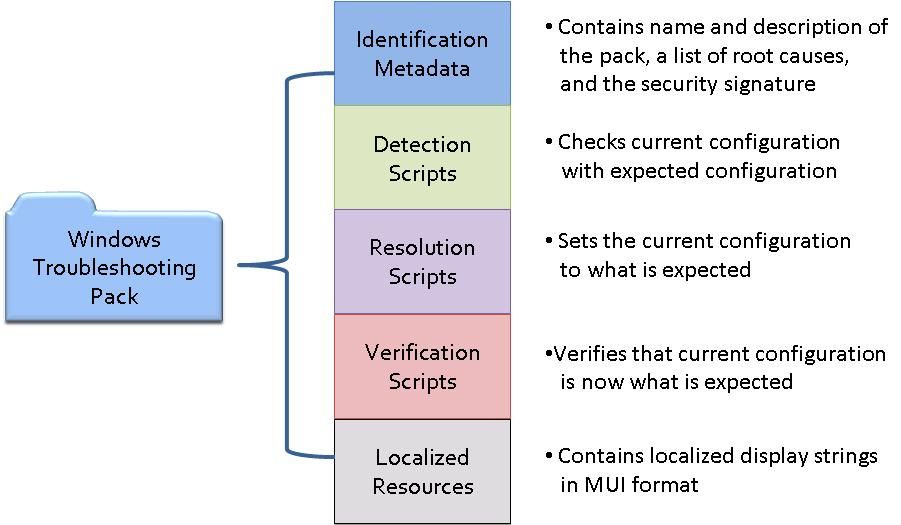
Cited from https://msdn.microsoft.com/en-us/library/windows/desktop/dd323706(v=vs.85).aspx
0x02 Developing Troubleshooting Packages
---
Official Development Tool:
TSPDesigner
Note:
This tool is included in the Windows 7 SDK
Actual testing shows only v7.0 and v7.1 include this tool
Windows 7 SDK version 7.0 requires .NET Framework 3.5 SP1, download link below:
https://www.microsoft.com/en-us/download/details.aspx?id=3138
Windows 7 SDK version 7.1 requires .NET Framework 4, download link below:
https://www.microsoft.com/en-us/download/details.aspx?id=8279
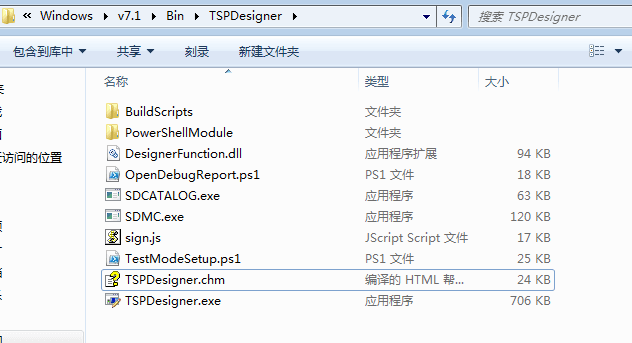
TSPDesigner is located in the default directory C:\Program Files\Microsoft SDKs\Windows\v7.1\Bin\TSPDesigner, containing the following:
As shown in the figure
Detailed development reference:
https://msdn.microsoft.com/en-us/library/windows/desktop/dd323712(v=vs.85).aspx
The following example demonstrates how to generate a troubleshooting pack using TSPDesigner.
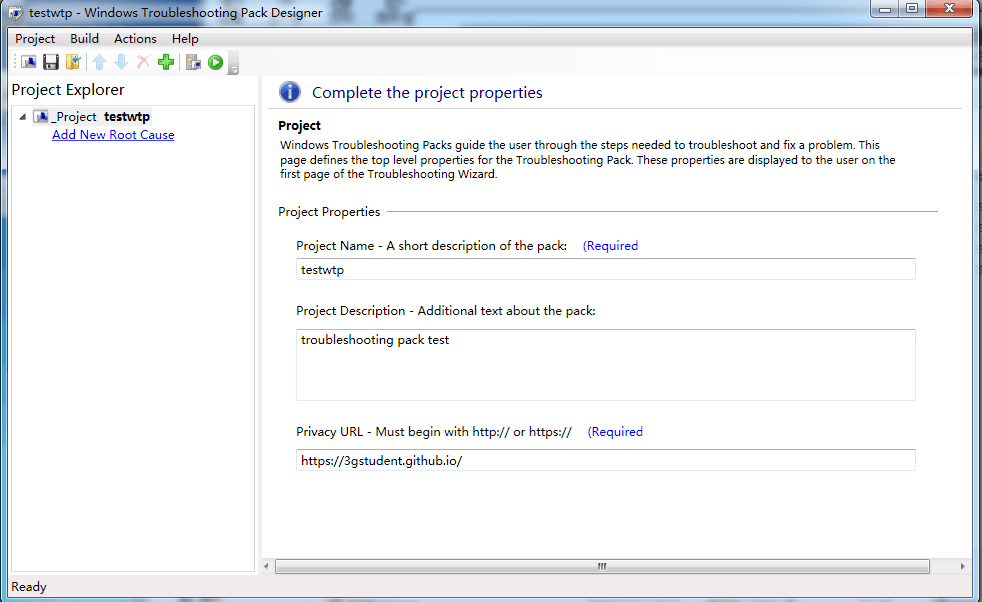
1. Set properties, which is the first page of the troubleshooting pack.
Project Name: testwtp
Project Description: troubleshooting pack test
Privacy URL: https://3gstudent.github.io/
As shown in the figure
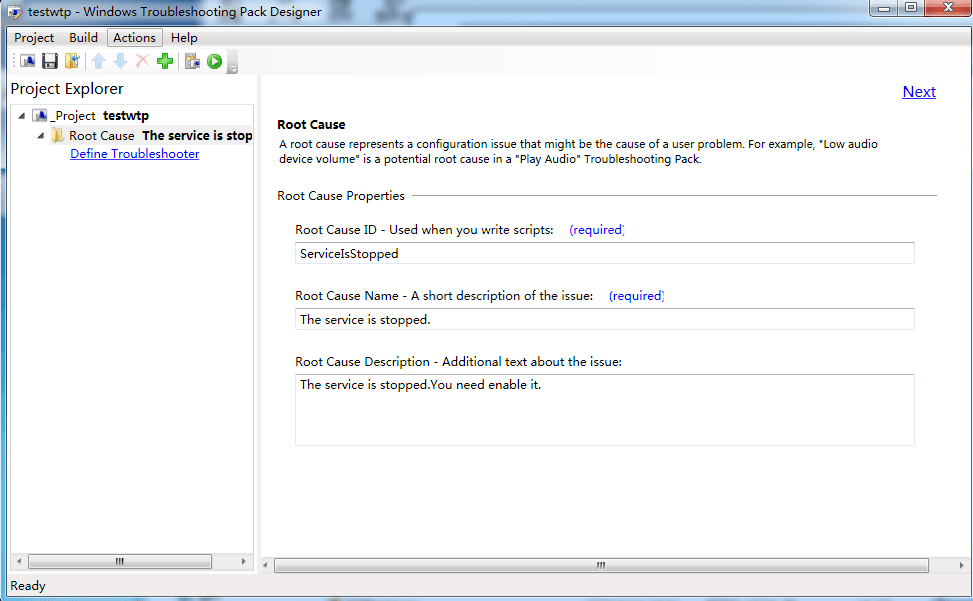
2. Add a root cause. Click Add New Root Cause and set the fault information.
Root Cause ID: ServiceIsStopped
Root Cause Name: The service is stopped.
Root Cause Description: The service is stopped. You need to enable it.
As shown in the figure
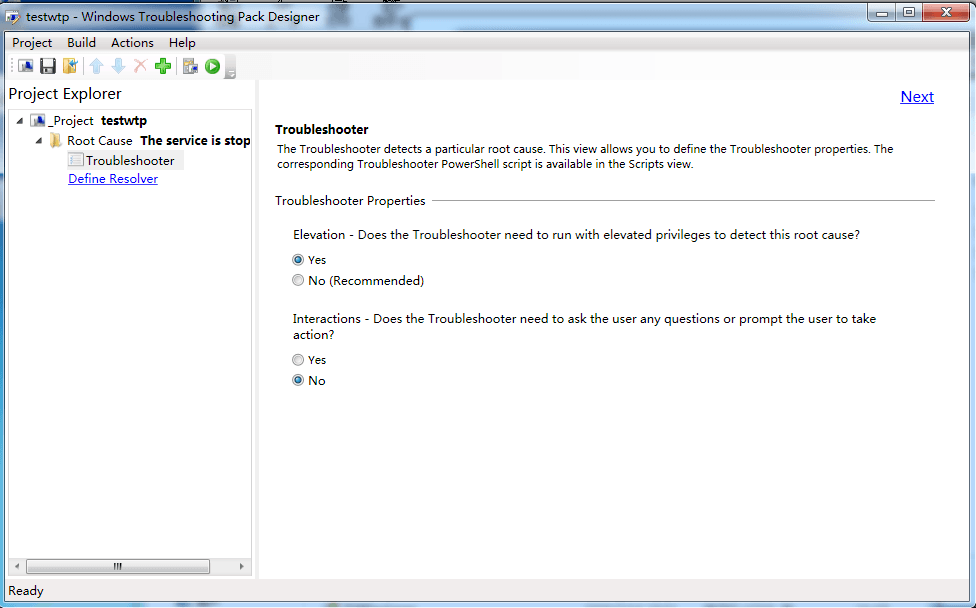
3. Set the Troubleshooter.
As shown in the figure, specify that elevated permissions are required and disable interaction.
4. Set Resolver
Resolver Name: StartTheService
Resolver Description: Start the service.
Prompt the User: No
Elevation: Yes
Interactions: No
As shown in the figure
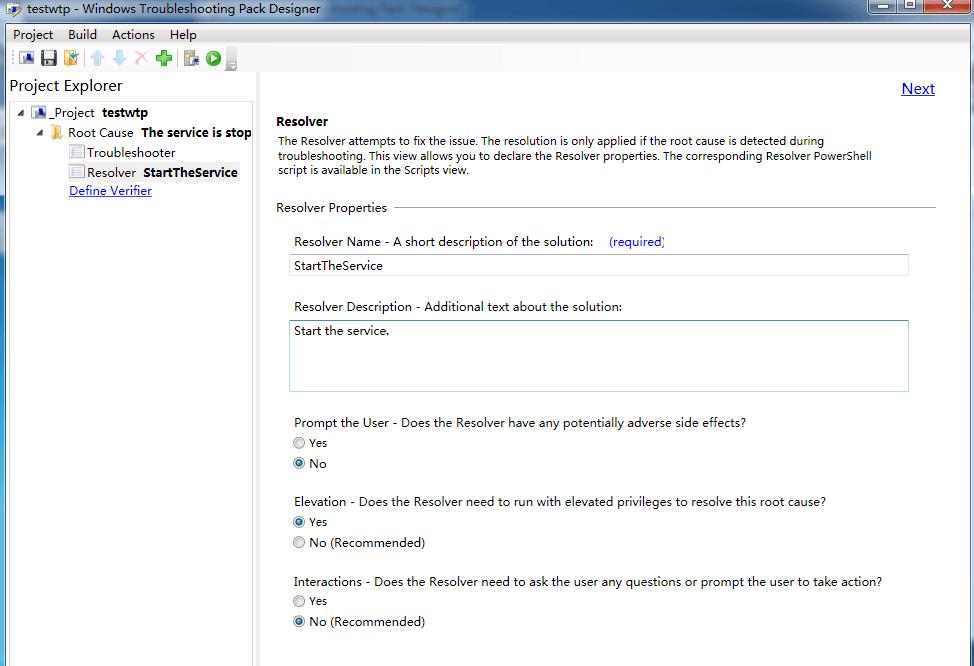
Specify that elevation is required, disable user warnings, disable interactions
5. Set Verifier
Select No, no need to confirm the issue is resolved
6. Set Scripts
As shown in the figure
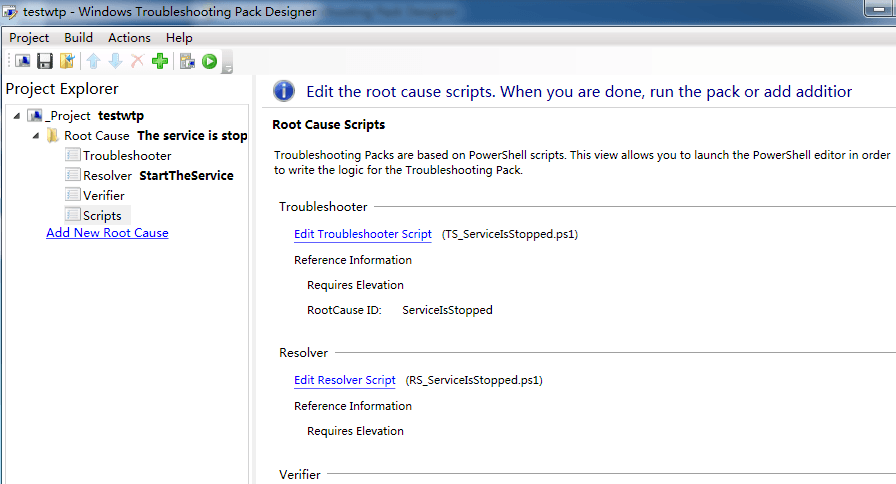
Note:
Since elevated privileges were specified in steps 3 and 4, the Troubleshooter Script and Resolver Script here already have administrator permissions
Payload can be added here
7. Set digital signature
Select Project-Options, find Code Signing
As shown in the figure
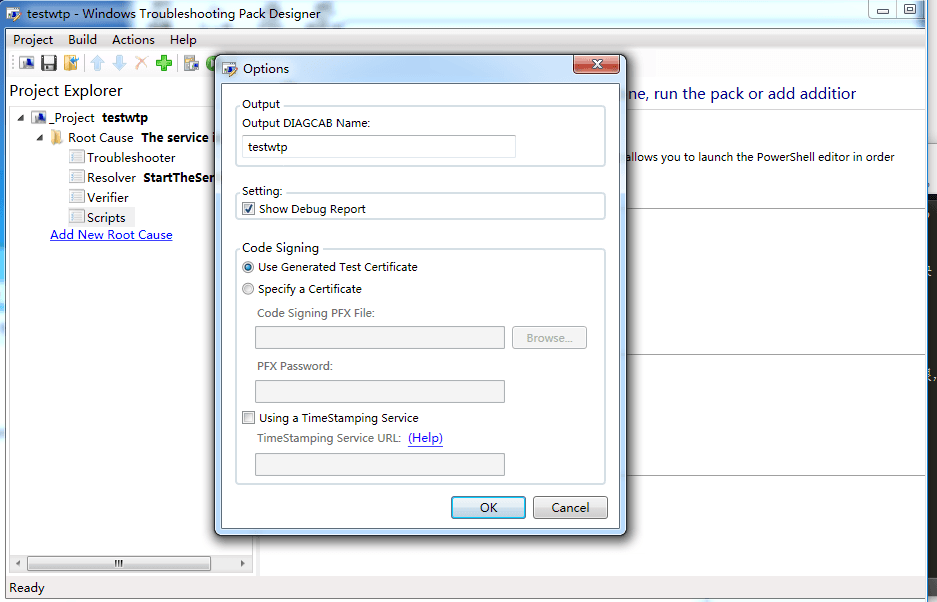
You can choose to use Test Certificate or specify a certificate
By default, select Use Generated Test Certificate for testing
8. Generate
Select Build-Build Pack
The following files are generated:
As shown in the figure
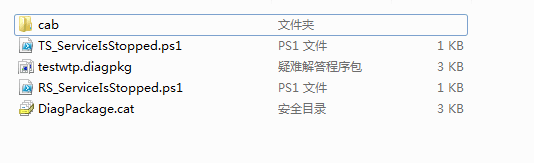
1.
TS_ServiceIsStopped.ps1 corresponds to Troubleshooter Script
RS_ServiceIsStopped.ps1 corresponds to Resolver Script
Note:
Examining these two ps scripts reveals the payloads they contain
2.
testwtp.diagpkg is the manifest file, containing parameters for the troubleshooting pack, in XML format. For specific syntax, refer to:
https://msdn.microsoft.com/en-us/library/windows/desktop/dd323781(v=vs.85).aspx
3.
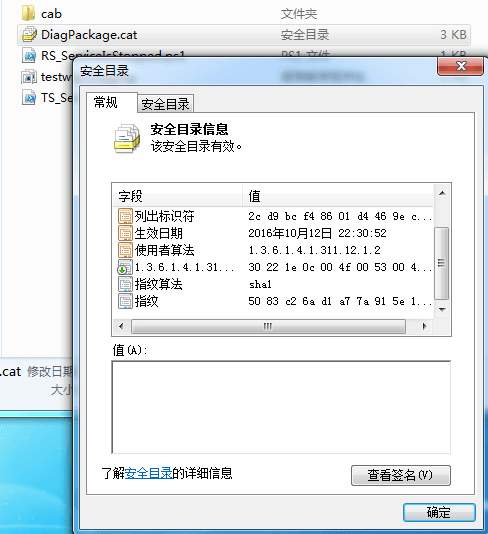
DiagPackage.cat stores the digital signature of this troubleshooting pack
Note:
The digital signature in the DiagPackage.cat file can be viewed by double-clicking
As shown in the figure
4.
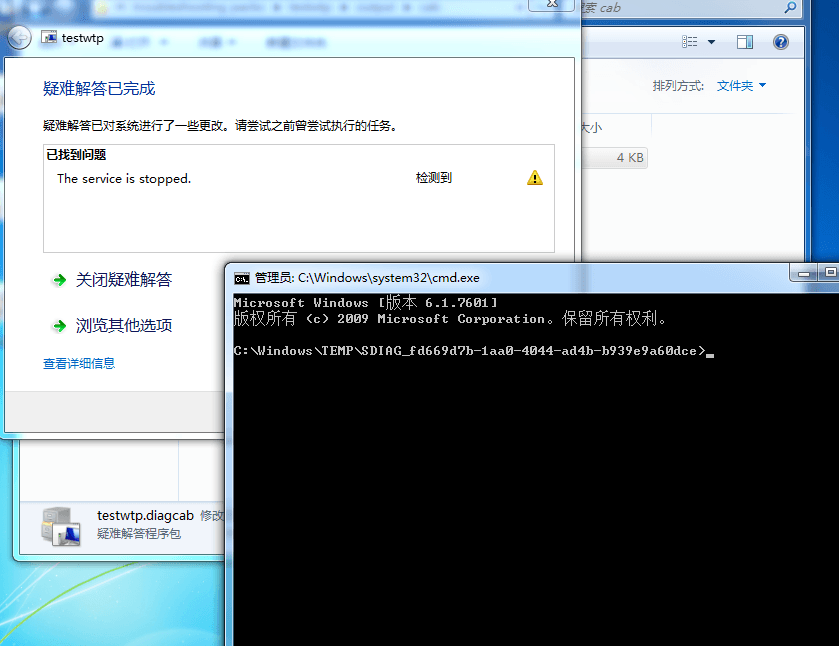
testwtp.diagcab under the cab directory is the packaged troubleshooting pack, containing information from the above files
As shown, during runtime the payload executes and launches a cmd.exe with administrator privileges
0x03 Testing Run Troubleshooting Package
---
Place the generated .diagcab file on another test system
Error reported, as shown
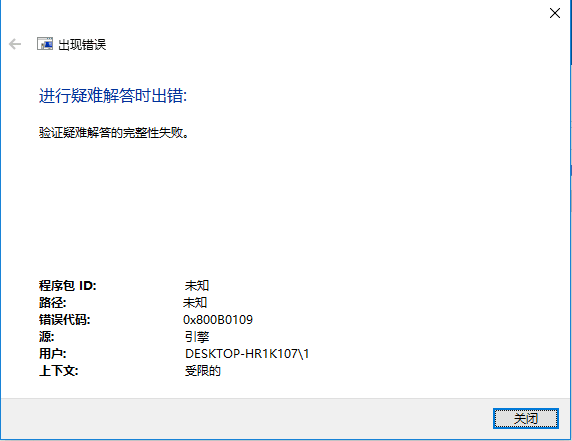
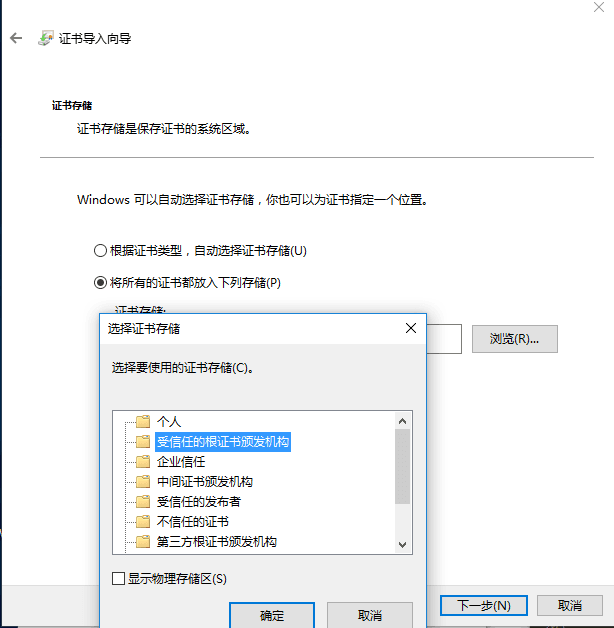
This occurs because the default Test Certificate used is not recognized on the new system. Locate the certificate file TestWindowsTroubleShooting.cer in the same directory as TSPDesigner and install it into the Trusted Root Certification Authorities, as shown
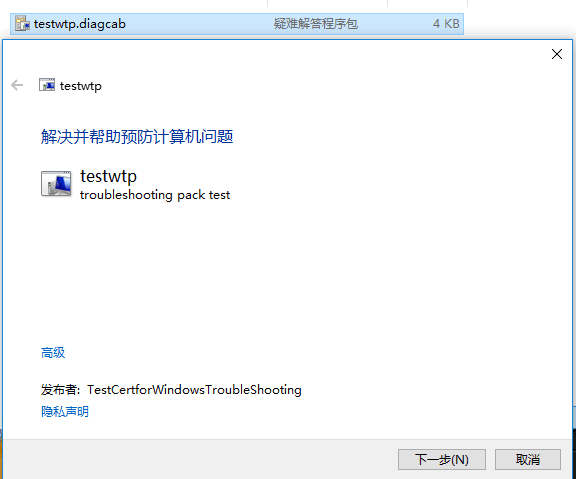
Digital signature successfully recognized, as shown below
Note:
The publisher name displayed here corresponds to the issuer used by the signing certificate, which is TestCertforWindowsTroubleShooting
Of course, if a certificate that is trusted by default is used, then this troubleshooting package is trusted by default and can be run directly
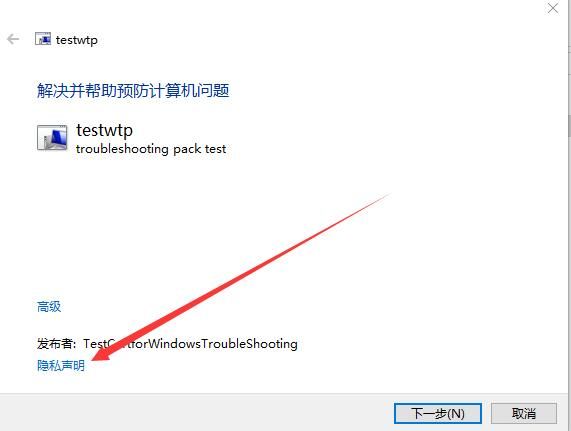
Click the privacy statement to open the Privacy URL set in Step 1: https://3gstudent.github.io/
As shown in the figure
At this point, the test troubleshooting pack has been successfully implemented
0x04 Summary
---
In penetration testing, using a troubleshooting pack offers the following advantages:
- More covert, as .diagcab files are uncommon
- More deceptive, as users often let their guard down with troubleshooting functions
- Direct administrator privileges can be obtained
- Embedded phishing pages with customizable privacy policy links
Defense recommendations:
Microsoft recognized this issue early on and added digital signature verification for troubleshooting packs. Therefore, when encountering a troubleshooting pack (e.g., when an operation triggers fault repair), the first step is to verify the publisher's identity.
Note:
In Microsoft-provided troubleshooting packs, the publisher name defaults to Microsoft Corporation